Although Fabric is gaining more and more features every day, the lack of some crucial ones prevents people from imagining how their existing data platforms can be extended towards Fabric. You can link your ADLS Gen2 to OneLake using Shortcuts, but you still can't create a Linked Service in Synapse or ADF for OneLake. It doesn't allow the Fabric DFS endpoint; it only works with ADLS Gen2. <add link for standalone forum post>
Until the official support arrives, we can call Synapse pipelines from Fabric using the REST API. It's pretty straightforward, and if you've dabbled with any Azure resource REST APIs before, you would be familiar with it. If not, don't worry. Because Fabric recently supported Service Principal Authentication, we don't need to worry about OAuth tokens, etc. We can trigger our pipelines with a simple POST request.
You can check the official Microsoft documentation for more details, but basically, this is the URL you'll need to construct to call the REST API:
POST https://<workspacename>.dev.azuresynapse.net/pipelines/<pipelinename>/?api-version=2020-12-01And if you need to pass any parameters to your pipeline, you can do so in the body as JSON:
{
  "name": "this is a parameter"
}
Let's build a Fabric pipeline that would trigger our Synapse one, step-by-step.
1.Create a Service Principal in Azure AD for Fabric Pipeline
For our Fabric Pipeline to be able to connect Synapse's REST APIs, we need a Service Principal to authenticate with. You can use "Organisational Account" as well, but we don't want your credentials to be used in our production system. It's too risky. We want our Workspace to have a Service Principal of its own, with permissions to only specific resources.
Go to Azure Portal > Azure Active Directory, and click the Create button at the top. Choose App Registration. Give it a name and create the registration.

Make a note of the Client ID and Tenant ID, then go to your App Registration's "Certificates & Secrets" page. Create a secret, and make a note of the secret value. That'll be your Client Secret.
App Registrations would have Service Principals assigned to them in the background when created from the Azure Portal. You could do this with the following Azure PowerShell command:
$sp = New-AzADServicePrincipal -DisplayName ServicePrincipalName2.Set Permissions in Synapse
You'll need to give permission to your Service Principal on your Synapse Workspace. It doesn't need any RBAC permissions on Azure Portal (Access Control page on Synapse resource). Still, you'll need to give permission using the Synapse Studio on the Access Control page under the Manage tab.
I gave the Service Principal a Synapse Administrator on the Workspace level for the simplicity of the example, but you can fine-tune it as you wish. I highly recommend not giving Synapse Admin permission on your production system.
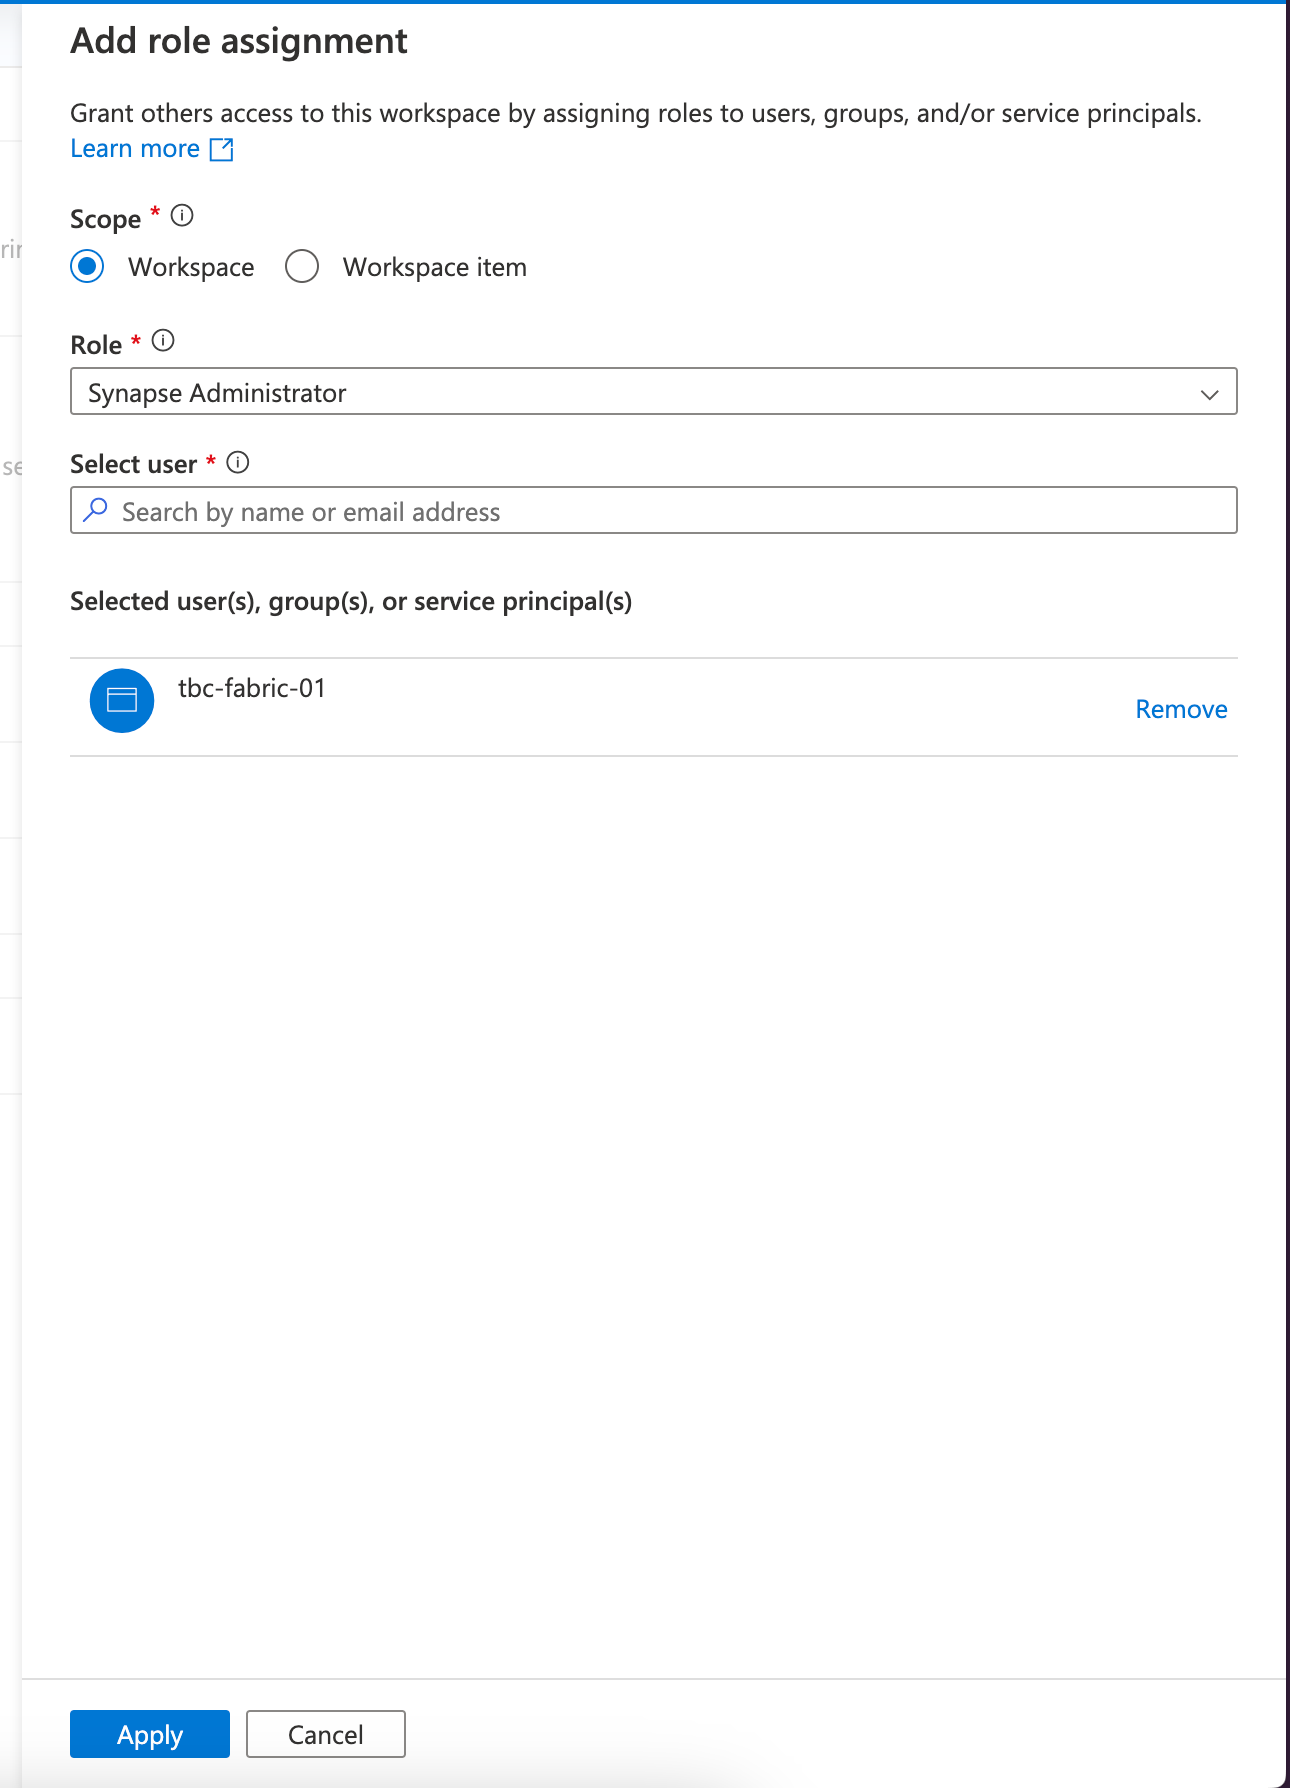
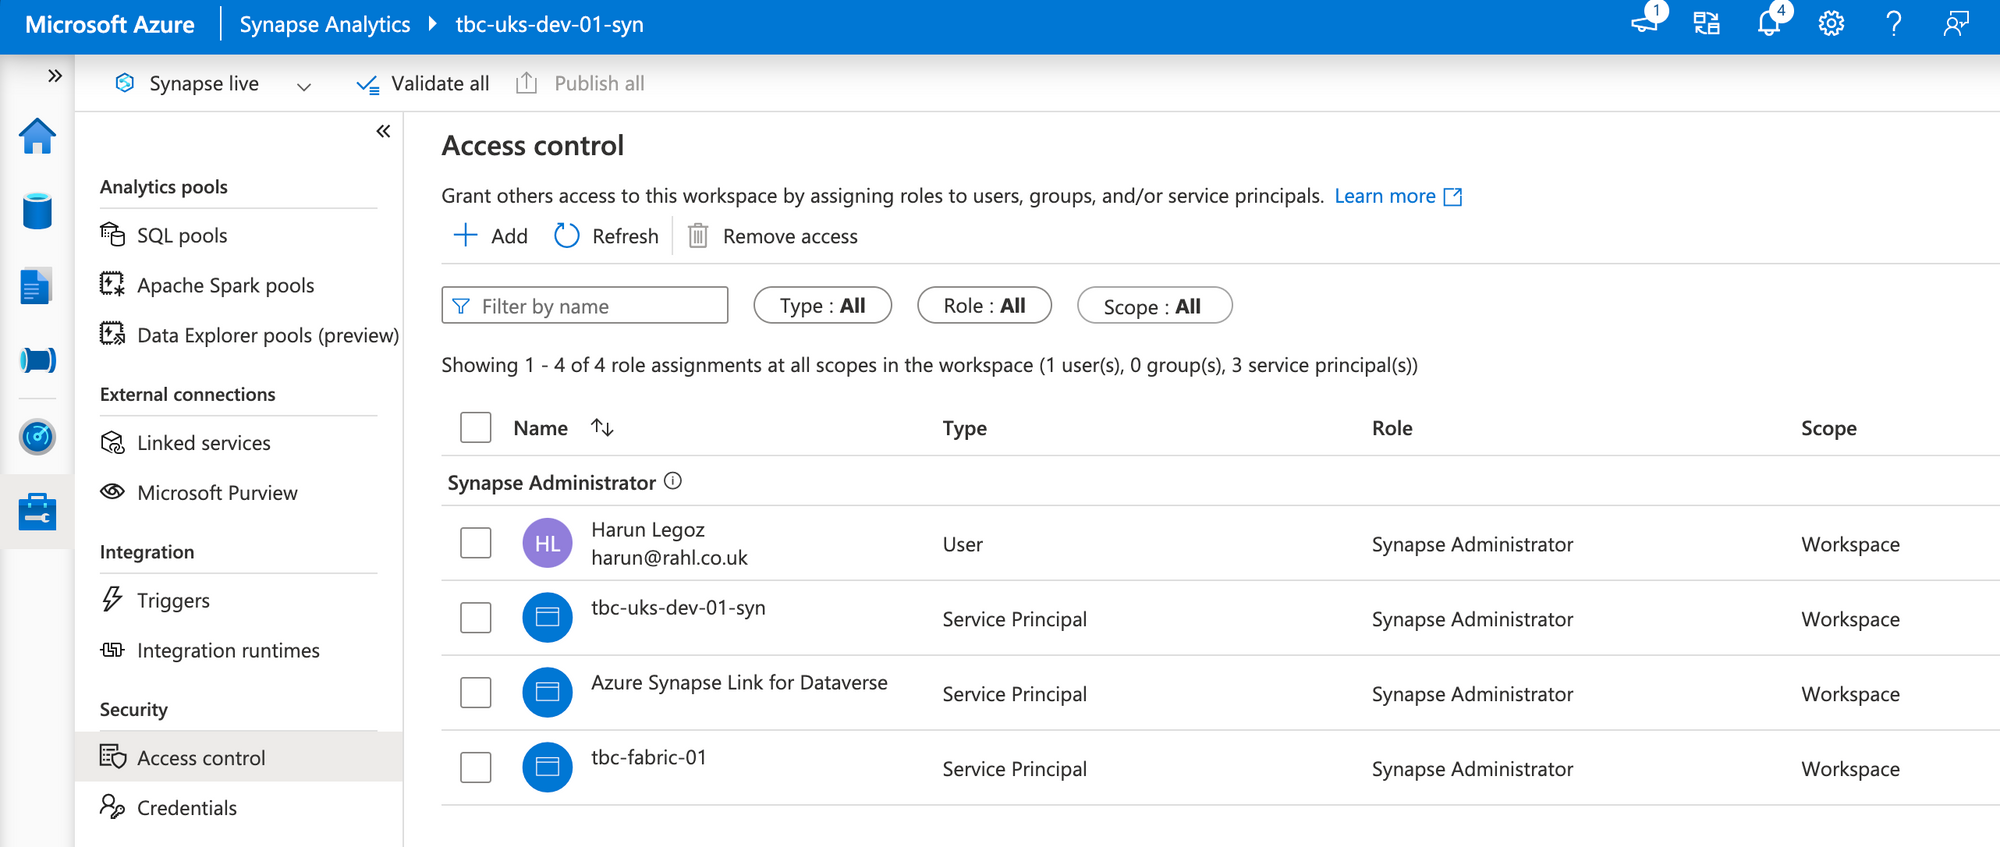
Granting permission on Synapse Studio for the newly created Service Principal
3.Create a Pipeline in Fabric
Next, we'll create a Pipeline in our Fabric workspace. Go to Fabric Portal and open up your Fabric-enabled Workspace. Create a new "Pipeline (Preview)". You can name it anything; I called it "TriggerSynapsePipeline".
Afterwards, use the Activities tab on the top ribbon and choose Web activity. It works the same way as it does in Synapse and ADF. Name the activity "Trigger Synapse Pipeline"

4.Add Web Activity and Configure It
Click on Web activity, and under Settings, choose Add Connection. It'll create a popup asking you the connection details for your Synapse workspace. Provide:
- Base URL: It should be in the format of
https://<workspacename>.dev.azuresynapse.net/ - Token Audience URL:
https://dev.azuresynapse.net/ - Authentication kind: Service Principal
- Tenant ID: Enter your Azure AD Tenant ID
- Service Principal Client ID: The client ID for your Service Principal
- Service Principal Key: The client secret for your Service Principal
Subscribe to TBC Weekly Newsletter!
Receive articles, tips and tricks from us and the Fabric community
SubscribeWhen filled, the form should look like the screenshot below:
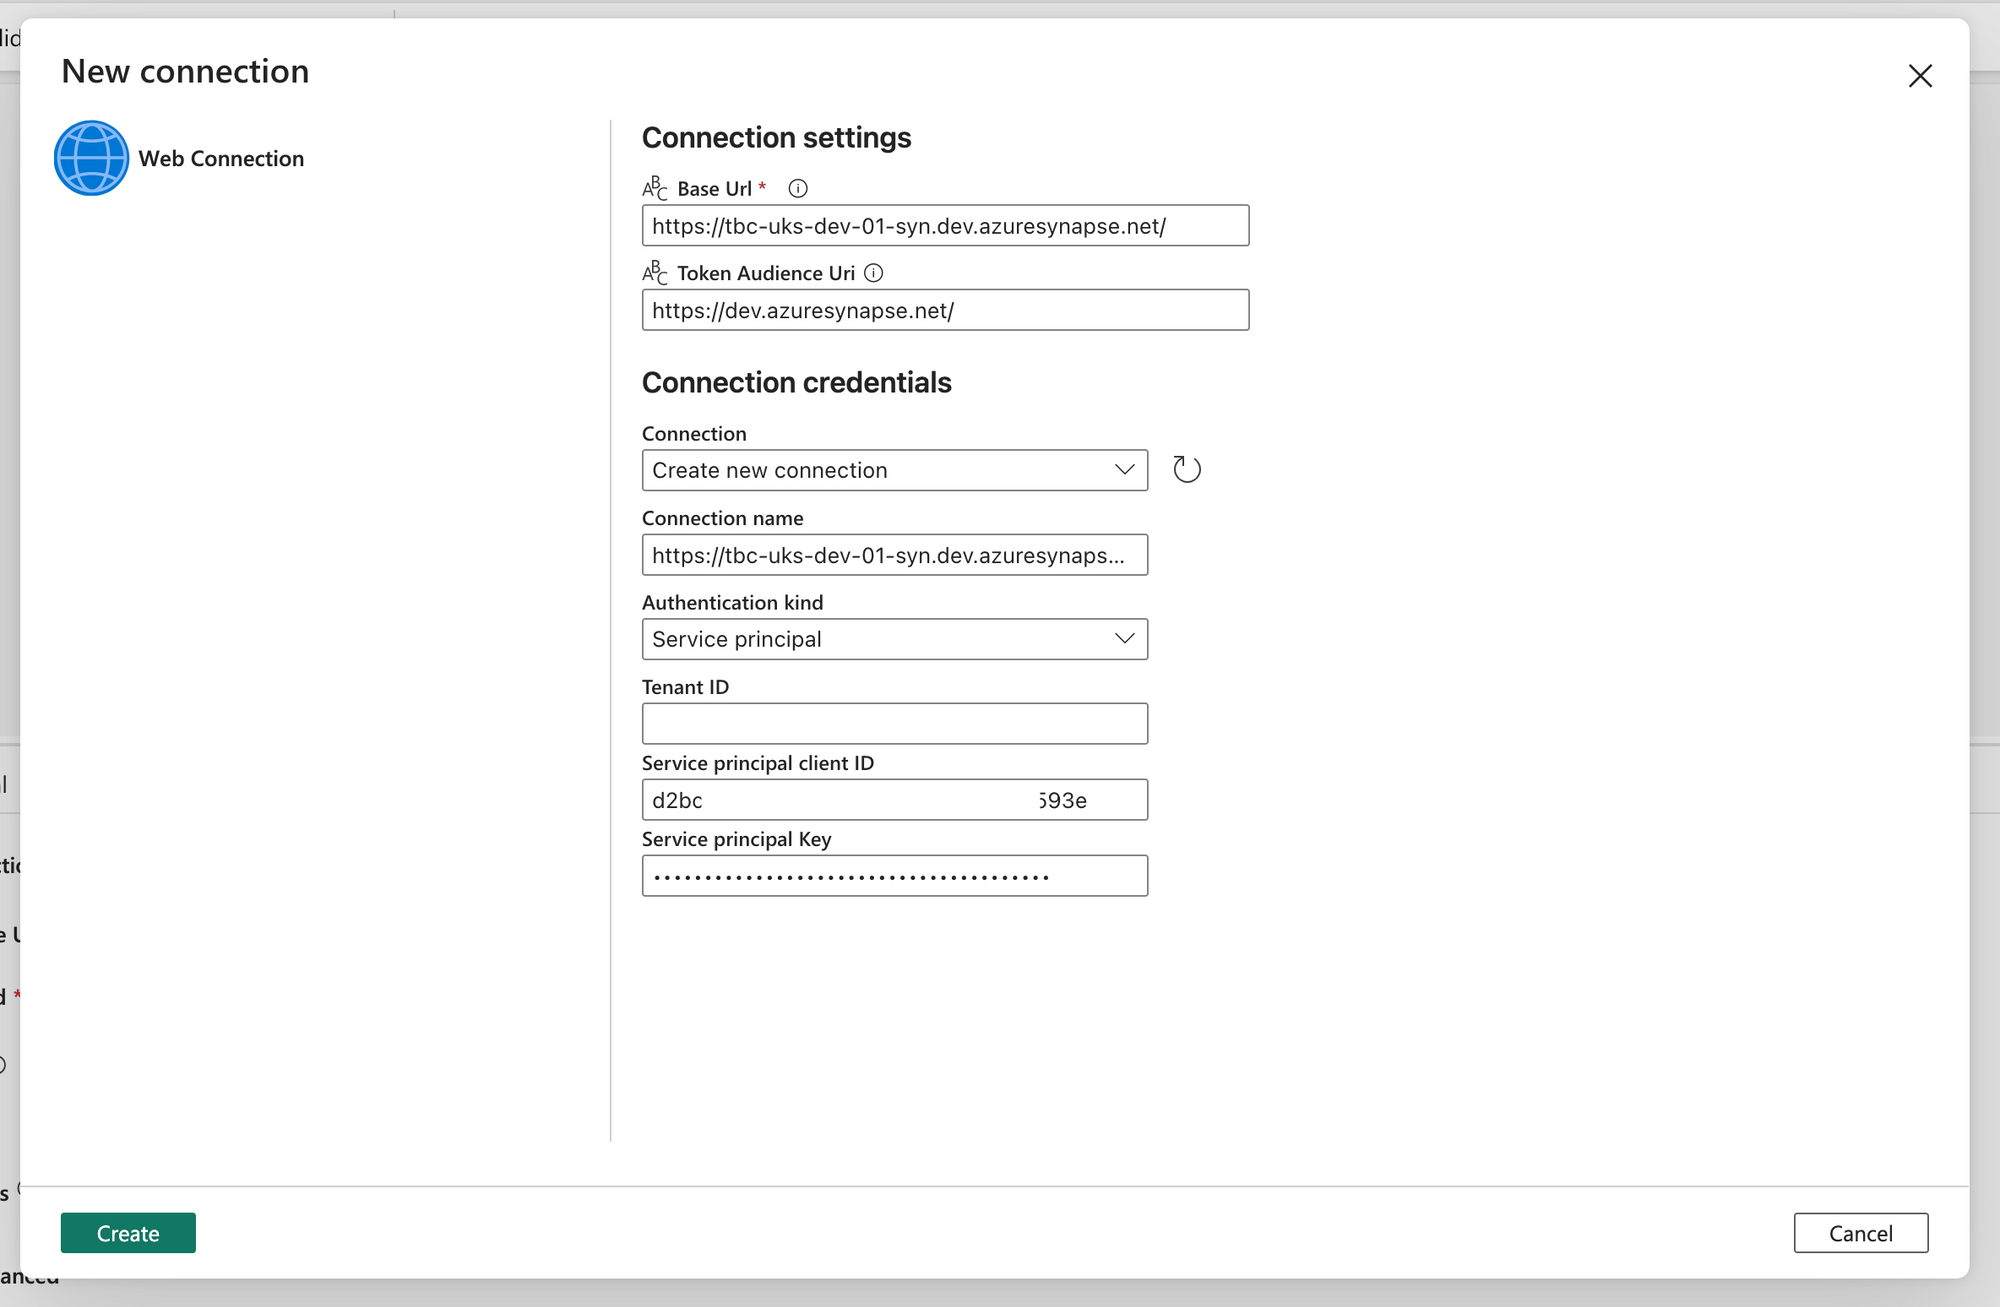
Click Create, and if you set up everything correctly, you can pass this screen with flying colours.
Next, we'll adjust the Web activity's rest of the settings. Set the values as below (replace pipeline name with your Synapse pipeline's name):
- Relative URL:
pipelines/<pipelinename>/?api-version=2020-12-01 - Method: POST
- Body: If you have any parameters, add them to the JSON body. If not, type
{}.
In the end, the settings part of Web activity should look like below:

That's it. Save your changes.
5.Trigger and Monitor
Once everything is set up, you can trigger your pipeline. After a few seconds, Fabric should give a success notification like this:

When you check the Monitoring section under Synapse Studio, you should see your pipeline has been executed successfully. If you have sent a parameter, you should be able to see the value in both Synapse and Fabric monitoring pages:

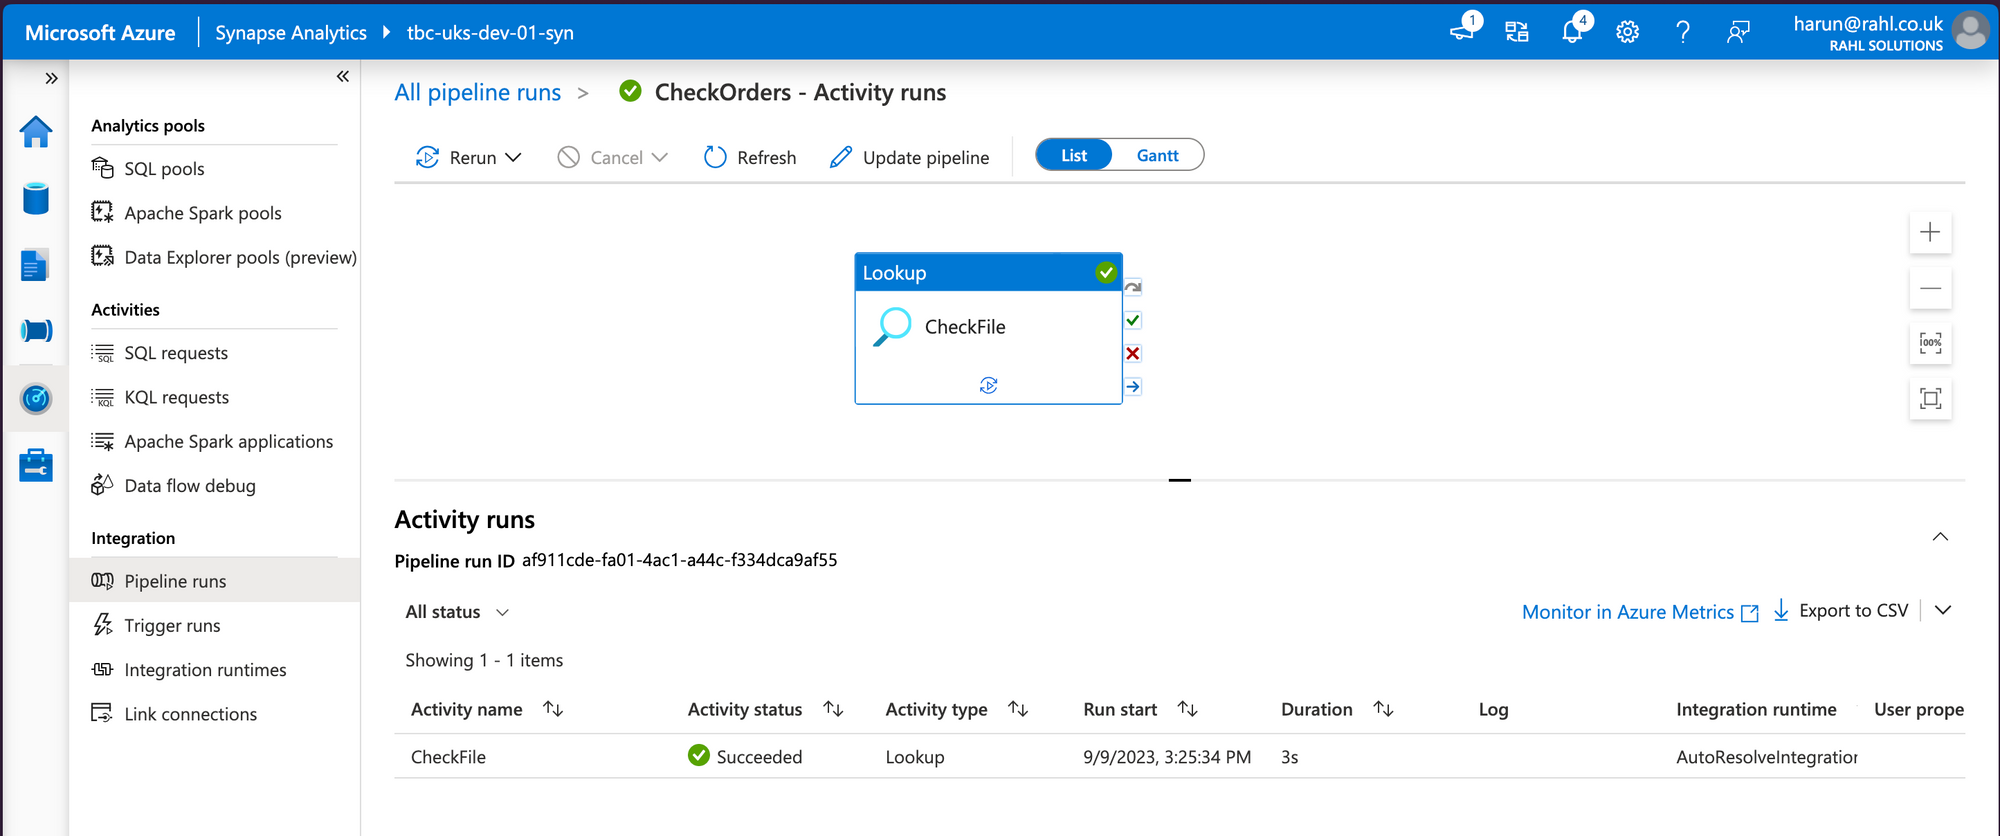
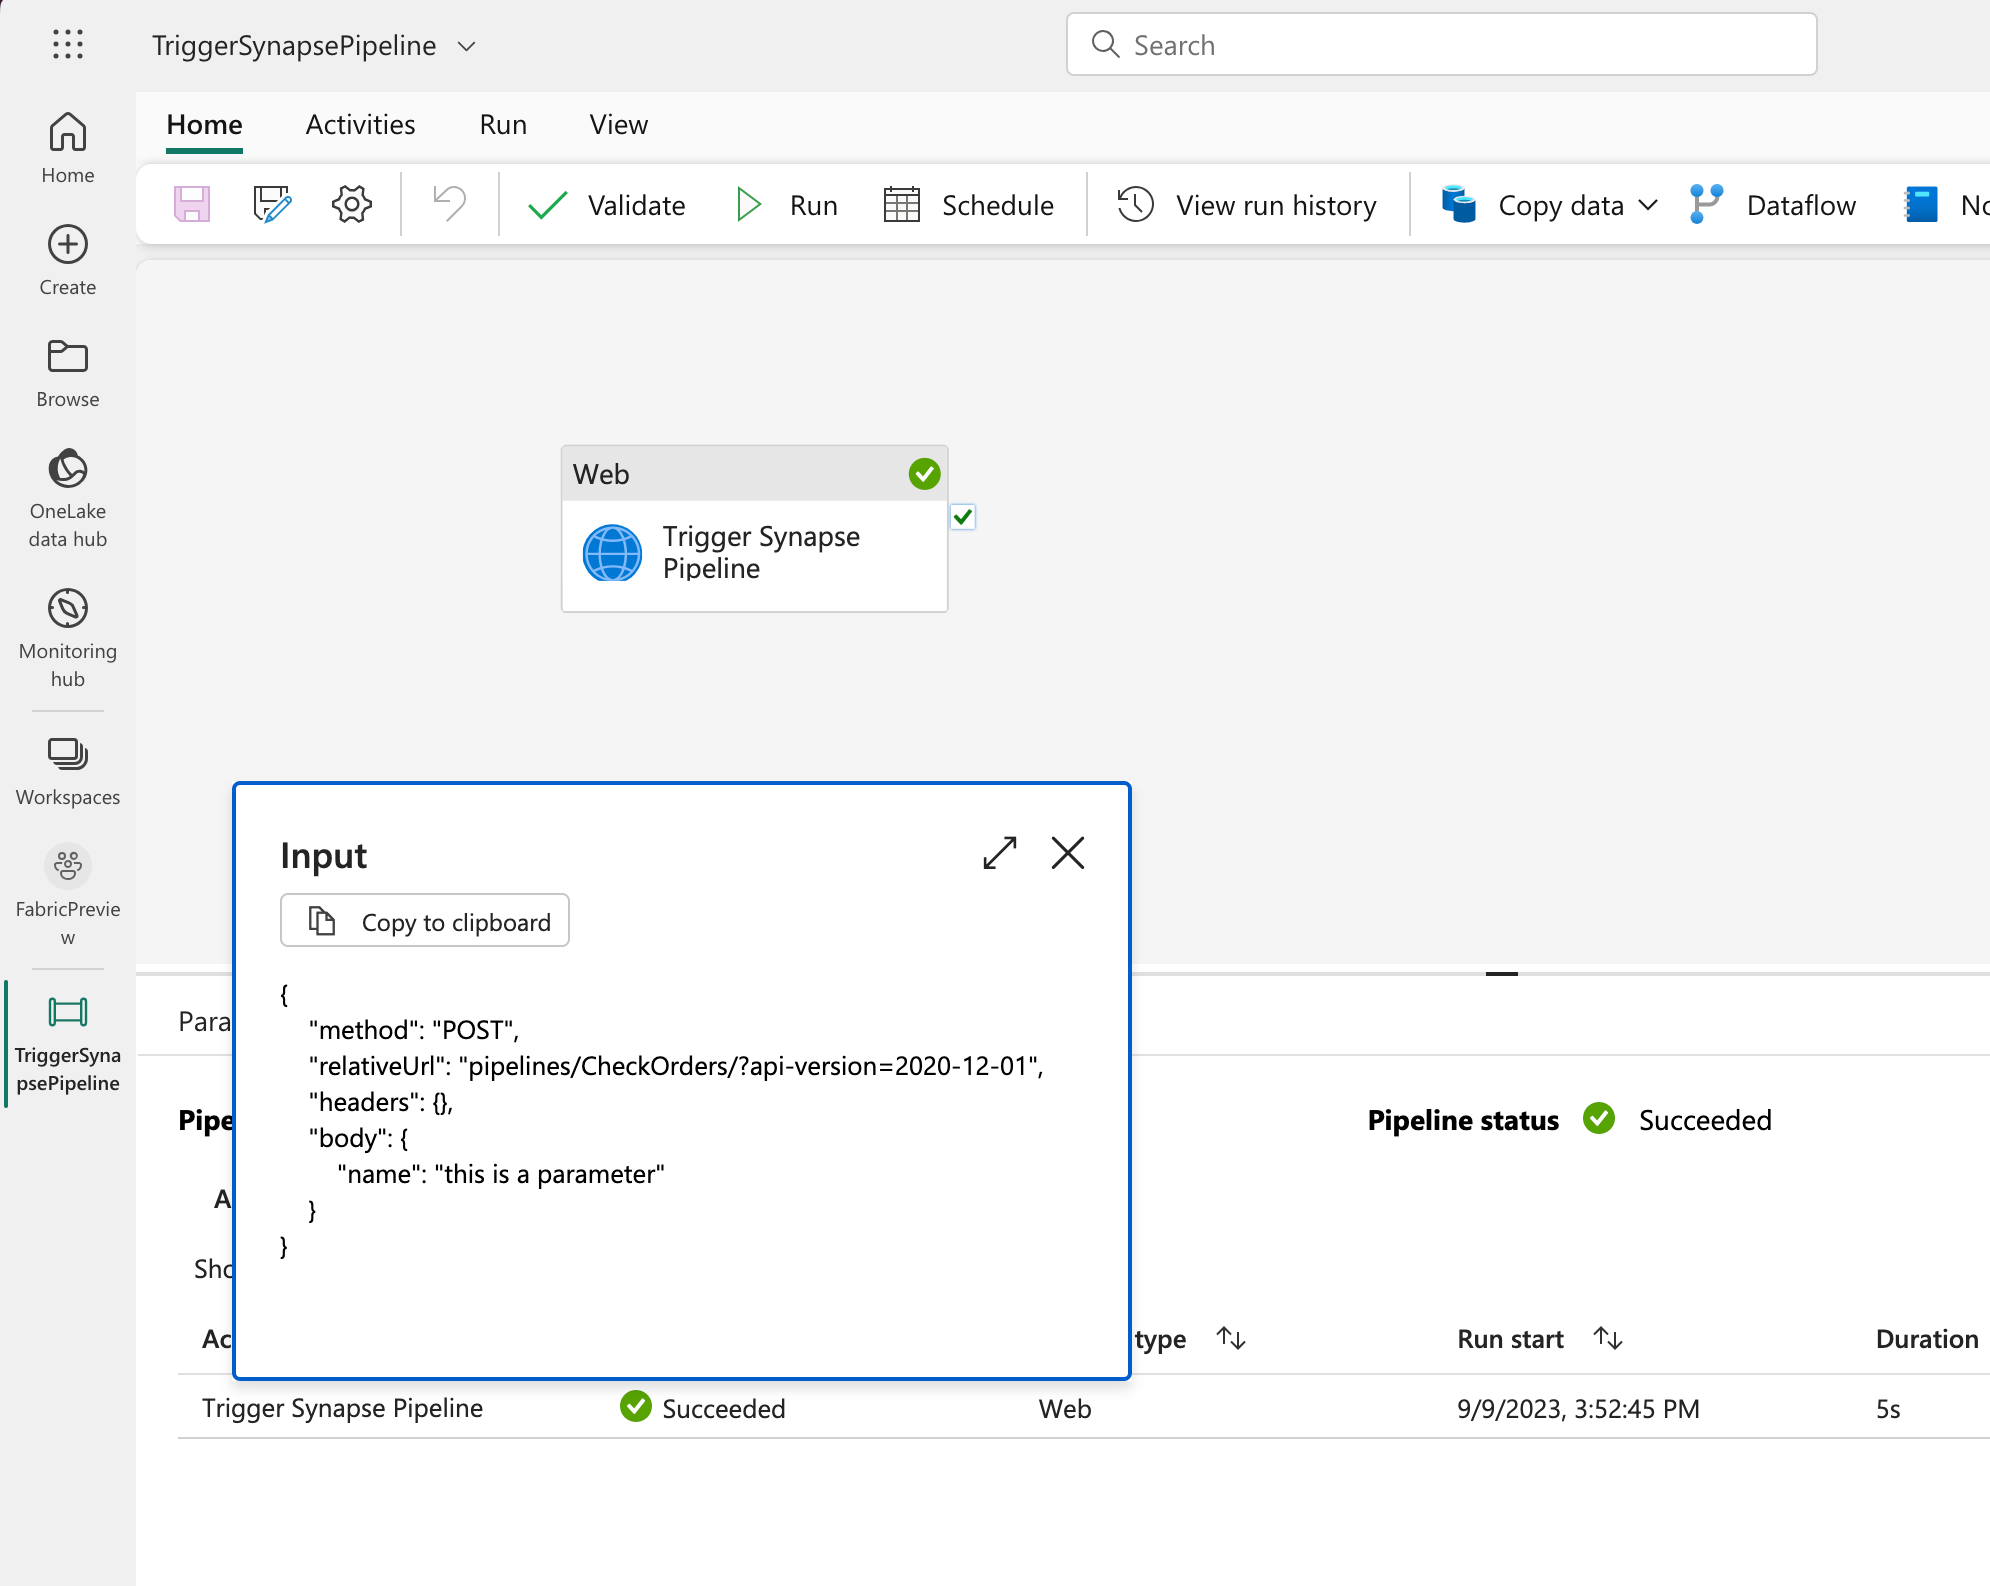
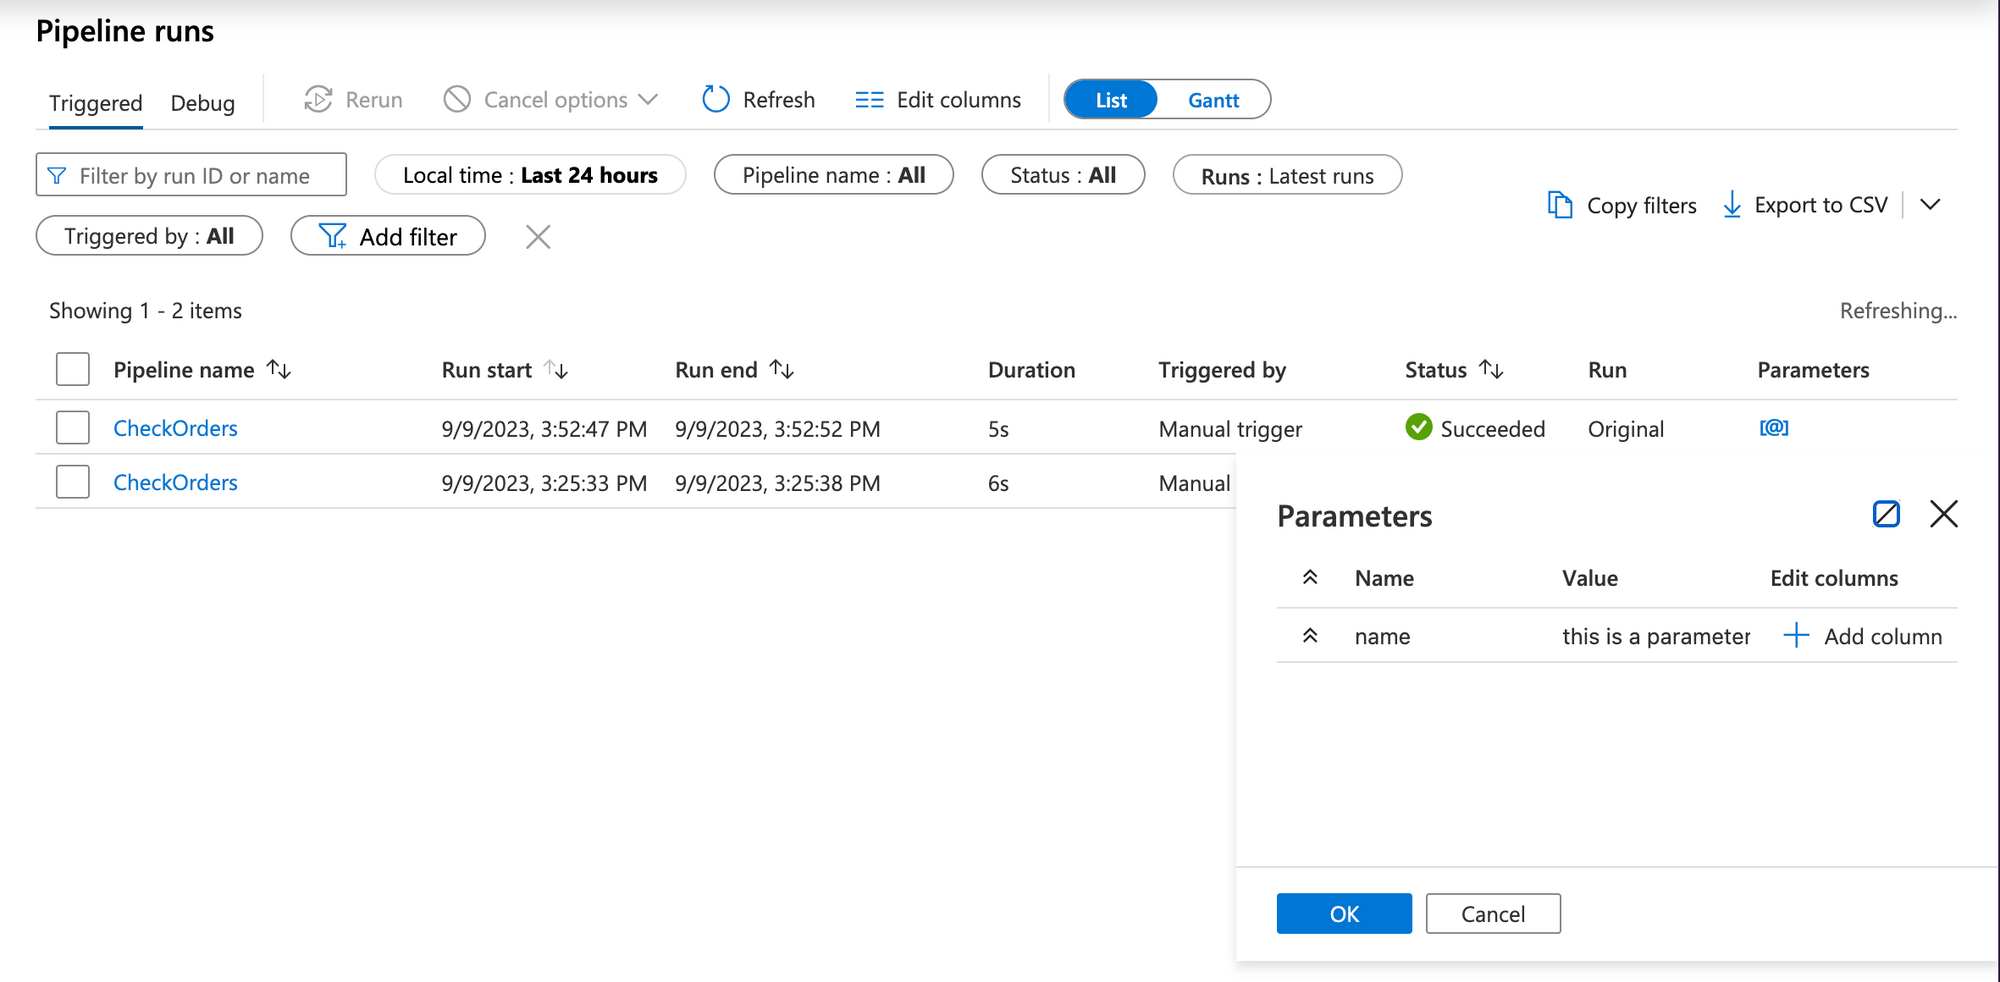
Synapse and Fabric monitoring pages
Conclusion
It's not pretty, but until the official activity arrives in Fabric to call Synapse Pipelines, this is the only way of achieving pipeline executions. To take this to the next step, you can add a While loop and check if your pipeline's execution is finished by making a Web call to the Get Pipeline Run endpoint using the Pipeline Run's ID given by the output of the Web activity that triggered it. You can add a Delay activity that would check it every few minutes.
Hopefully, this helps you to understand how Synapse and Fabric can be used together and what opportunities lie ahead.


Remember to subscribe to our TBC Weekly newsletter! You'll get a summary of the latest articles from us and the Fabric and Azure communities.

